Introduction – Why encrypted cloud backup is important
I store a lot of important data to myself and my family on my FreeNAS network storage system. I backup locally using external hard drives, but it’s challenging to regularly find the time to dedicate to taking this to a location away from my home.
It’s also very important to me that my data is encrypted with my own custom encryption key before uploading to the cloud – since the cloud is really just “Other People’s Computers”, it’s important to me that my data confidential isn’t vulnerable to disclosure in the event of a breach of the cloud provider.
I’ve been without a good cloud backup option for my home NAS since the shutdown of Crashplan Home last year, so I was thrilled to see FreeNAS added a cloud backup option in the 11.0 release earlier this year. However I wasn’t willing to send my data up to the cloud without being encrypted with my keys first.
With the new FreeNAS 11.2 release currently in Beta, the option to encrypt data has been added. I found this feature to be so important that I went ahead and upgraded to the beta.
I wanted to share how I went about configuring encrypted cloud backup in FreeNAS 11.2 since I expect this will be a feature quite a few FreeNAS users will want to utilize. I also want to share the steps I tested for restoring to a non-FreeNAS system in a disaster recovery scenario, this will be part 2 of this post.
Lets get started!
Prerequisites:
- FreeNAS running release 11.2 or newer.
- Cloud storage provider account.
For the cloud storage account, anything compatible with rclone will work, including most object storage services like Amazon S3, Azure Blob Storage, and Google Cloud Storage. There is also support for file sync services like Dropbox, Google Drive, and many more. There is even an option for SFTP, if you would like to create your own destination server.
I’ve chosen to utilize Backblaze B2, so this guide will cover it specifically, but the steps should be very close for any cloud destination supported by rclone. Backblaze B2 includes 10 GB of use for free, perfect for completing the initial setup process.
I’m choosing not to use the cheaper Dropbox or Google Drive options because after my previous negative experience with Crashplan Home shutting down, I’m wary of using a service that isn’t specifically intended for uploading several Terabytes of my data. Backblaze B2 does this at a cost I can justify even as a home user.
Backblaze B2 Storage Bucket Setup
When you create your Backblaze B2 account, your account will have an Account ID and a Master Application Key. You could these, HOWEVER since the Master Application Key has full read/write access to all B2 Buckets, it’s much better to setup a dedicated key for each application accessing the B2 Bucket. I will cover this in a few steps.
Create a Bucket, make sure it is set to private (this is the default). Your Bucket name needs to be unique across all Backblaze B2 buckets.

Congratulations, you now have a Bucket on your Bucket List!
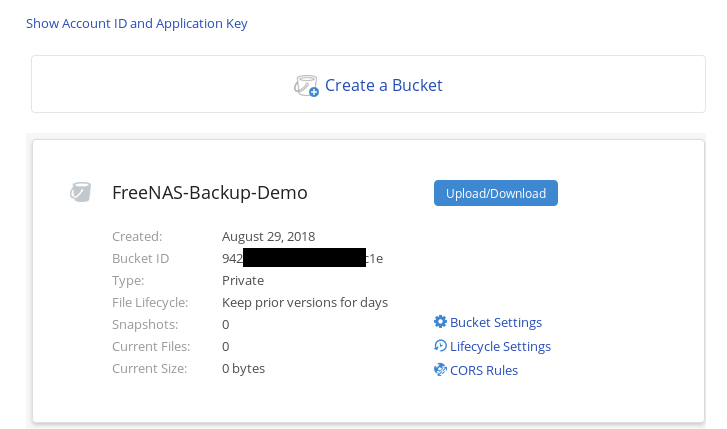
The first thing you will want to do after creating the Bucket is to evaluate the Lifecycle Settings option. By default, all versions of files are retained forever. Depending on your use case this may not be what you want. In my case, I adjusted to only keep older versions for 10 days (I’m already using ZFS snapshots in FreeNAS, so doing this in the cloud as well is redundant for my use case).

Now we will create an Application ID for FreeNAS to use to upload to the Backblaze B2 Bucket.
Backblaze B2 Application ID Setup
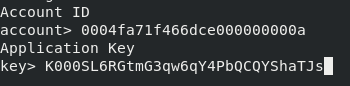
Go to your Account Screen in Backblaze B2, and choose “Show Account ID and Application Key”

Generate a new Application Key. Give it a name, and set it to only access the bucket you created.
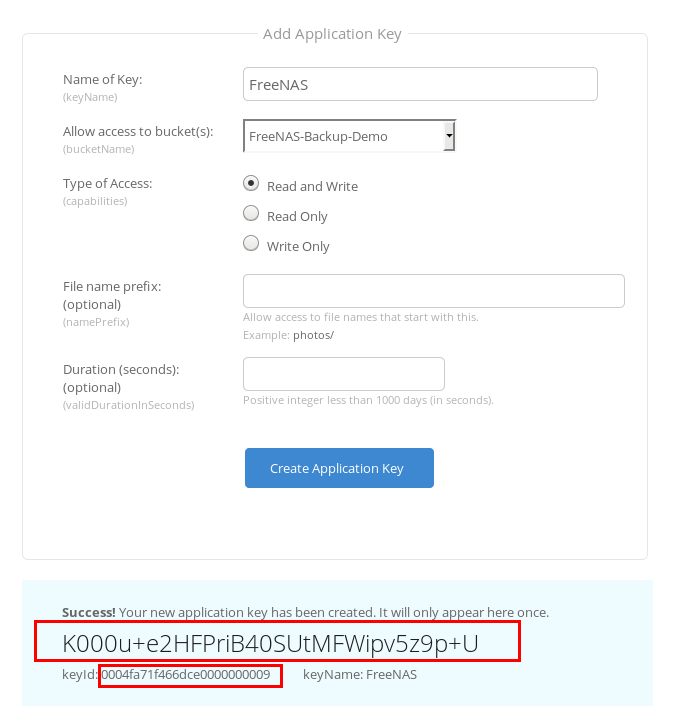
Save this Application Key somewhere safe. It will only be displayed in the B2 interface once. You will also need the KeyID. All Done, time to add to FreeNAS!
Cloud Account Setup in FreeNAS
Login to you FreeNAS, then go to “System > Cloud Credentials”

Set the Provider to “Backblaze B2” then enter the KeyID from Backblaze into the Account ID field in FreeNAS. Enter the Application Key into that field.
This screen does not do any verification of credentials, so if you get an account error later in the process, you will need to come back here and figure out the mistake.
Next, to setup the cloud sync job, go to “Tasks > Cloud Sync Tasks” in FreeNAS
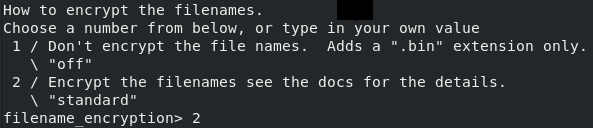
At this point, you will need to decide if you want to encrypt the filenames, as well as the file content. Not encrypting the filenames makes retrieving individual files from the Backblaze web interface much easier. However, it also potentially gives away some information about the contents of the file. I have chosen to encrypt filenames.
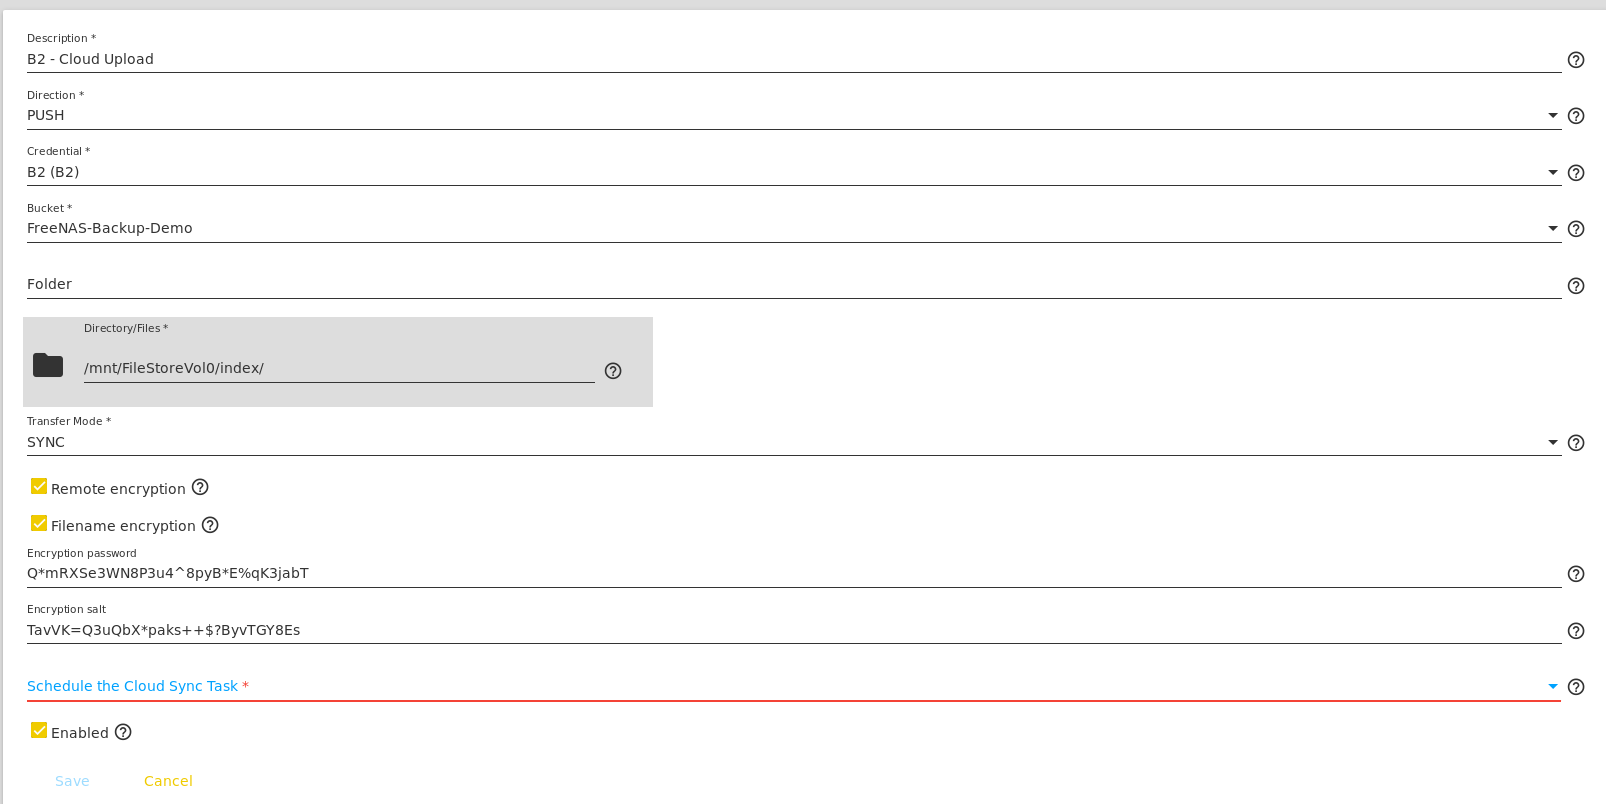
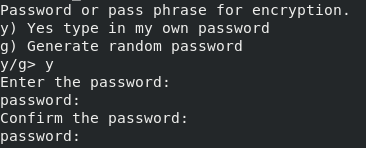
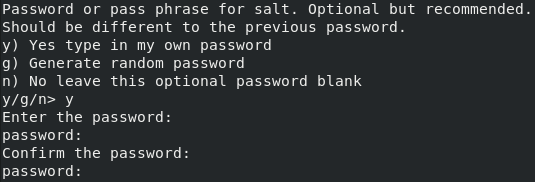
You will need an encryption password, and ideally a separate salt as well. I recommend creating some completely random strings using passwordsgenerator.net
MAKE SURE you save these carefully, as your backup is useless without them.
You can pretty much take the defaults on this page. You will need to specify the path on the FreeNAS you want to upload.
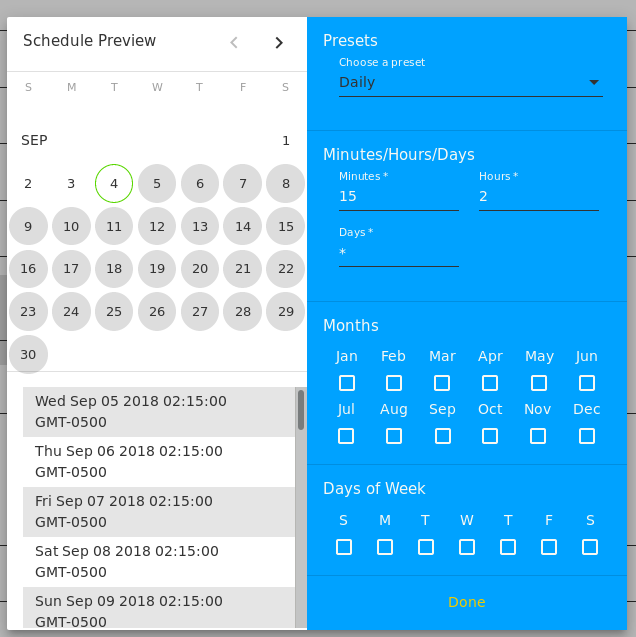
As a final aside, I love the little cron scheduler built in here. I create cron jobs just frequently enough that I forget the syntax, so the little preview is great.
Verification
Congratulations you’re all set!
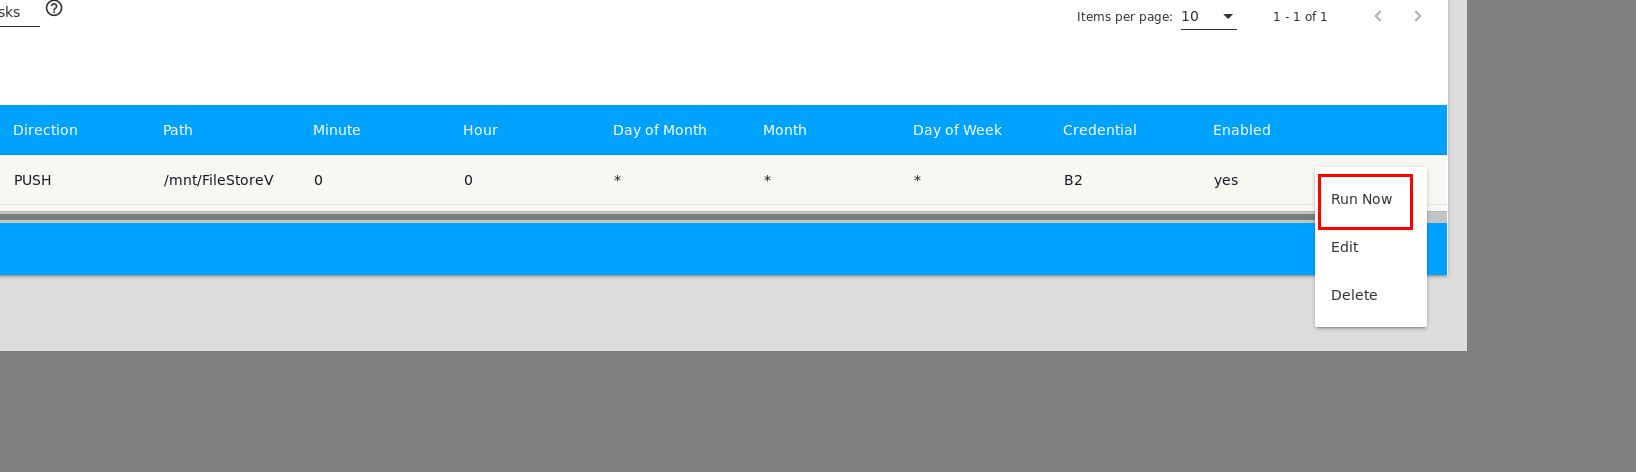
You can manually kick off the initial upload if you want it to start sooner than the first scheduled run.
Now to upload your data. In my case, it took about 10 days to upload an initial Terabyte of data (home upload speed is about 10 Mbit).
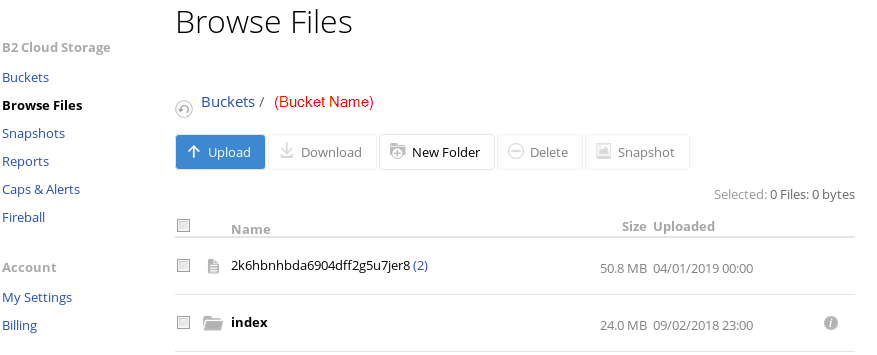
You should be able to browse the Bucket in the Backblaze B2 Web UI, and see files starting to populate. If you chose to encrypt filenames, they will match, otherwise you will see random names like in this screenshot.

That’s it!
For a guide for recovering backed up files from Backblaze using rclone, see Part 2 of this series.


 Select “n” for New remote
Enter a name – I’m using B2-RAW (indicating this is the raw B2 data, which we won’t be able to see since it is encrypted).
Select “n” for New remote
Enter a name – I’m using B2-RAW (indicating this is the raw B2 data, which we won’t be able to see since it is encrypted).
 Enter your Account ID (This is the keyID from Backblaze B2) and your Application Key from Backblaze B2.
 (Account ID/keyID and Application Key are examples that have since been deleted)
You will be asked to enter an endpoint, just leave this blank.
Finally, you will be asked to confirm the entered data. Confirm it looks correct, then select “y” to continue.
(Account ID/keyID and Application Key are examples that have since been deleted)
You will be asked to enter an endpoint, just leave this blank.
Finally, you will be asked to confirm the entered data. Confirm it looks correct, then select “y” to continue.
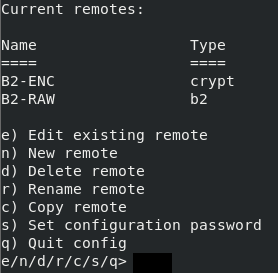
 You should now be presented with a list of your rclone remotes, which should include the B2-RAW we just added. Select “q” to quit the config wizard.
You should be able to run the “rclone ls” command and see a list of encrypted files and filenames.
You should now be presented with a list of your rclone remotes, which should include the B2-RAW we just added. Select “q” to quit the config wizard.
You should be able to run the “rclone ls” command and see a list of encrypted files and filenames.
 The result of the “rclone ls” command should match what you see when you login to Backblaze B2 and browse the bucket. It may look like gibberish, but any result is success at this point!
 Make a note of the remote path you used above (B2-RAW:bucketname/ in my case). You will need this in the next step.
 Enter the remote path you used above (B2-RAW:bucketname/ in my example). This tell rclone what to decrypt.
 Next, tell B2 how you encrypted filenames. If you chose to encrypt filenames in your FreeNAS setup, choose option 2. If you didn’t encrypt filenames, choose option 1.
 For the next step, you will want to enter your own encryption passphrase, since you already created this when you setup the encrypted backup. Enter the encryption passphrase used by FreeNAS when backing up the data.
 Next, enter the salt you used when encrypting data in FreeNAS (you will need to select ‘y’ to indicate you have an existing salt). Entering the salt is optional, so if you chose not to use a salt then leave it blank.
 Finally, you will be asked to confirm the entered data. Confirm it looks correct, then continue.
 You should now be presented with a list of your rclone remotes, which should include the B2-RAW we just added. Select “q” to quit the config wizard.
 Run the rclone ls command on your new remote, you should now see your data!

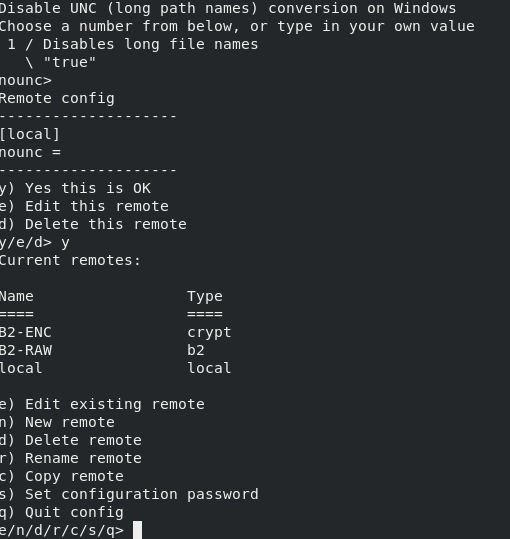
 If you are recovering to a Windows system, you will want to chose the option to disable long filenames support. Otherwise you can leave blank.
 Time to copy down some files!
 If the source you specify is a directory, rclone will pull down all the files on that directory. If you are pulling down a lot of files, I recommend using the -v switch so you can track the process. Also note that if the specified source path is a directory, rclone will pull down all files and subdirectories.
